AMIGA alive

AMIGA alive

Sunday, August 11, 2019

A501 coin-cell battery modification

The name "VARTA" strikes fear into the hearts of Amiga 500 plus, and A501 memory expansion owners: VARTA rechargeable batteries have been built into these devices, and with growing age are prone to leak green acid, damaging the printed circuit boards and other components.

Original rechargeable battery from an A501 memory expansion
So it's an absolute requirement to remove that rechargeable battery, and clean the PCB from all acid that might have spilled out, if you want to keep your device intact. Most Amigans seem to use vinegar and alcohol for cleaning, sometimes using a tooth-brush to rub off any damaged material. If you don't catch the "infection" in time, traces or components might be damaged, requiring repairs.

But still it would be nice to have a working backup battery installed to your machine. Coin-cells, type CR2032, are a good replacement, they're widely available, and do not leak. But keep in mind that these aren't rechargeable - the Amiga provides recharge-current to it's batteries, so when replacing the original rechargeable one, we need to take care of that to avoid (additional) damage.

Removing the rechargeable VARTA battery shouldn't be a problem, you just need a soldering iron. Next is the cleaning - and if you're unlucky - repair job.

When you're done so far you can install you coin-cell. The original VARTA batteries are 3.6V. CR2032 coin-cells are 3V, that's within range for the clock chips used in Amiga 500 pluses and A501 memory expansions (mostly OKI M6242 chips).

With some googling I found Daniel Schneller's nice article on how to do the replacement. He's done what's required, and added a few details, mainly putting the new battery on a separate board to avoid stress to the original PCB when exchanging the coin-cell in the future - an idea I like very much. I basically did the same, but wanted to keep my A501 in "one-piece", so I decided to put the extra board onto the A501 itself. According to one CR2032 manufacturer's docs, a diode and a 200 ohms (minimum) resistor are required to keep the Amiga's recharge-current away from the new, non-rechargeable battery. I'm using a 220 ohms resistor, just for a little bit of extra-safety.

Here's a schematic of the new battery board:
Battery board schematic (click to enlarge)

Nothing spectacular - have a piece of drilled board ready, the components as shown in the schematic, add a coin-cell holder, wires, and pin headers, and basically all that's left is the soldering.

New coin-cell battery on a separate drilled board
To fix the new board to my A501 I added several layers of duct-tape to the bottom side for padding, and a small piece of extra-strong double sided sticky tape as a (hopefully) removable glue.

The extra board is held in place by double-sided sticky tape

I'm quite pleased with the result! It doesn't look totally amateurish, there's close to zero modification to the original PCB, the sticky tape should keep the new board properly in place - and if I should ever want to do so, I could probably revert the modification completely.

And best of all: it works. :-)

Thank you very much, Daniel Schneller, for sharing your know-how and experience!


Sources:
http://www.danielschneller.com/2018/02/amiga-500-restoration-a501-memory.html 
http://www.farnell.com/datasheets/1496885.pdf
http://thomas-rapp.homepage.t-online.de/index.html
http://thomas-rapp.homepage.t-online.de/download/RestartClock.lha

Thursday, August 8, 2019

Building the TerribleFire TF530 accelerator, part 6: Faster! Hotter!

With a little more experience and new information gained, there was something left to do...

Disclaimer: This is not an instruction. Use at your own risk. No responsibility taken for whatever you do. Safety first. Kids, dont try this at home. 

32MHz might not be too shabby, but then it's a weird number, and the TF530 is capable of more. It's been quite some time since I built my TF530. In the meantime Mr. Leary has released new firmware versions, improving the accelerator's compatibility with higher clock rates (among other things, probably). So the day had come to try a little tweaking.

First of all I had to test the latest firmware release. I fired up my laptop running Xilinx's CPLD programming software, connected the USB-cable to one, and TF530 5V power input to another USB port on the laptop. Surprise: The Amiga boots! It pulls enough power from the laptop's USB port to boot to Workbench! And of course the laptop (running Windows) complains about a USB device pulling way too much power! Ok, I'd better disconnect the power, remove the TF530 from the Amiga, reconnect, and try again...

Faster!


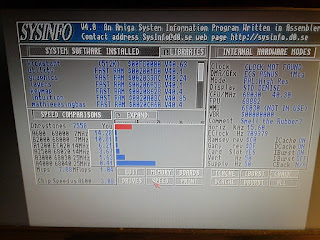
Without any changes to the TF530 I uploaded the latest software to the CPLDs. Hm, not bad! Worked flawlessly, and SysInfo shows a little speed increase of about... 3%! Not precisely earth-shattering, but a welcome improvement.

From ~5800 Dhrystones to ~6000 just by firmware update!

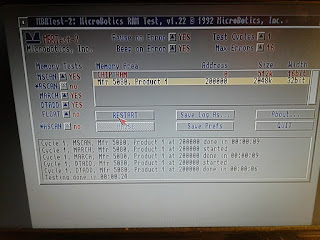
I had never thoroughly tested the memory chips, and the new firmware needed something to do, so I started Microbotic's excellent MBRTest-2 memory testing program, and ran a couple of tests. To my surprise there were no errors - my handling and soldering of the memory chips was fine from day zero!

No RAM errors, very good!
So far, so - very - good. I had seen some accelerator configurations where the 68030 had been overclocked by about 25%, and the FPU on my TF530 is a 40Mhz model anyway, so, yeah, why not try 40Mhz on the 33Mhz CPU?

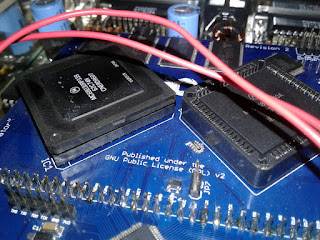
33Mhz CPU and 40MHZ FPU - will they run fine at 40MHz?

Replacing the tiny SMD type 32Mhz oscillator with a 40Mhz one requires some fiddling if you don't have a heat-gun, but these oscillators seem to be quite tolerant to heat, and I managed to do it using a soldering-iron without any visible damage. After some cleaning it was time to switch the Amiga on, and see how she does...

~7500 Dhrystones!

Hotter!


Once again, to my surprise, this worked flawlessly! Wow, running at 40Mhz we get about 7500 Dhrystones in SysInfo! The 68030 is getting a bit hot - I'll be adding at least a small heatsink just to avoid unnecessary stress on the material.

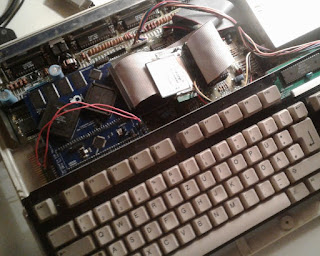
TerribleFire 530 with CF card adaptor inside the "Amiga 530"

As a final touch to my "Amiga 530" I wanted to delete AmigaOS3.9 from the CF card, and reinstall OS3.1. With some little adjustments OS3.9 ran quite well on the machine, but it's still comparatively resource-hungry, and in some parts unnecessarily bloated, thus slow. Installation of OS3.1 - no surprise here - was quick and worked flawlessly, too. Another reset, and...

...the Amiga now boots to Workbench in about 9 seconds!

This is really good. I could try to get a 50Mhz CPU and install a 50Mhz oscillator - the 40Mhz FPU should be able to take that (the 33MHz CPU probably not so much...) - but for now I'm really perfectly satisfied with the performance. Firmware update, plus faster clock, plus operating system downgrade really make a difference. I'm assuming an added heat-sink will make the setup safe and stable in the long term.

Now will THIS be the last part of the series of articles about "Building the TerribleFire TF530 accelerator"? Who knows. Probably not! There's still so much to experiment with - we haven't even touched the SPI port yet!

Once again a huge Thank You! to Mr. Stephen Leary for developing and releasing this awesome accelerator!


Overview and back catalogue of the series:
http://amigaalive.blogspot.de/p/hardware-building-terribefire-tf530.html